Blog

  • Timber Pergolas, carports and verandas

    [av_textblock size=’14’ font_color=” color=”]
    Timber pergolas, patios and all other additions to your home, are best undertaken by the team at Queensland Roofing due to our roofing experience. When building, adding or replacing a new frame of a timber pergola, patio or carport, please consider the following as to why you would choose a roofing company like Queensland Roofing in ensure it is a weather proof addition to your home.

    Timber pergola, veranda or carport
    Timber pergola structure have specifications for spans. Wider timber spans create a better aesthetic  appearance if you are not enclosing the timber.
    Timber Pergolas Brisbane
    We can not stress enough the importance of roof design of your pergola. We have been asked to provide roofs for other companies that have tried to build pergolas. The frame was incorrect the pergola had to be re-built.

    Important note to home owners about additions:

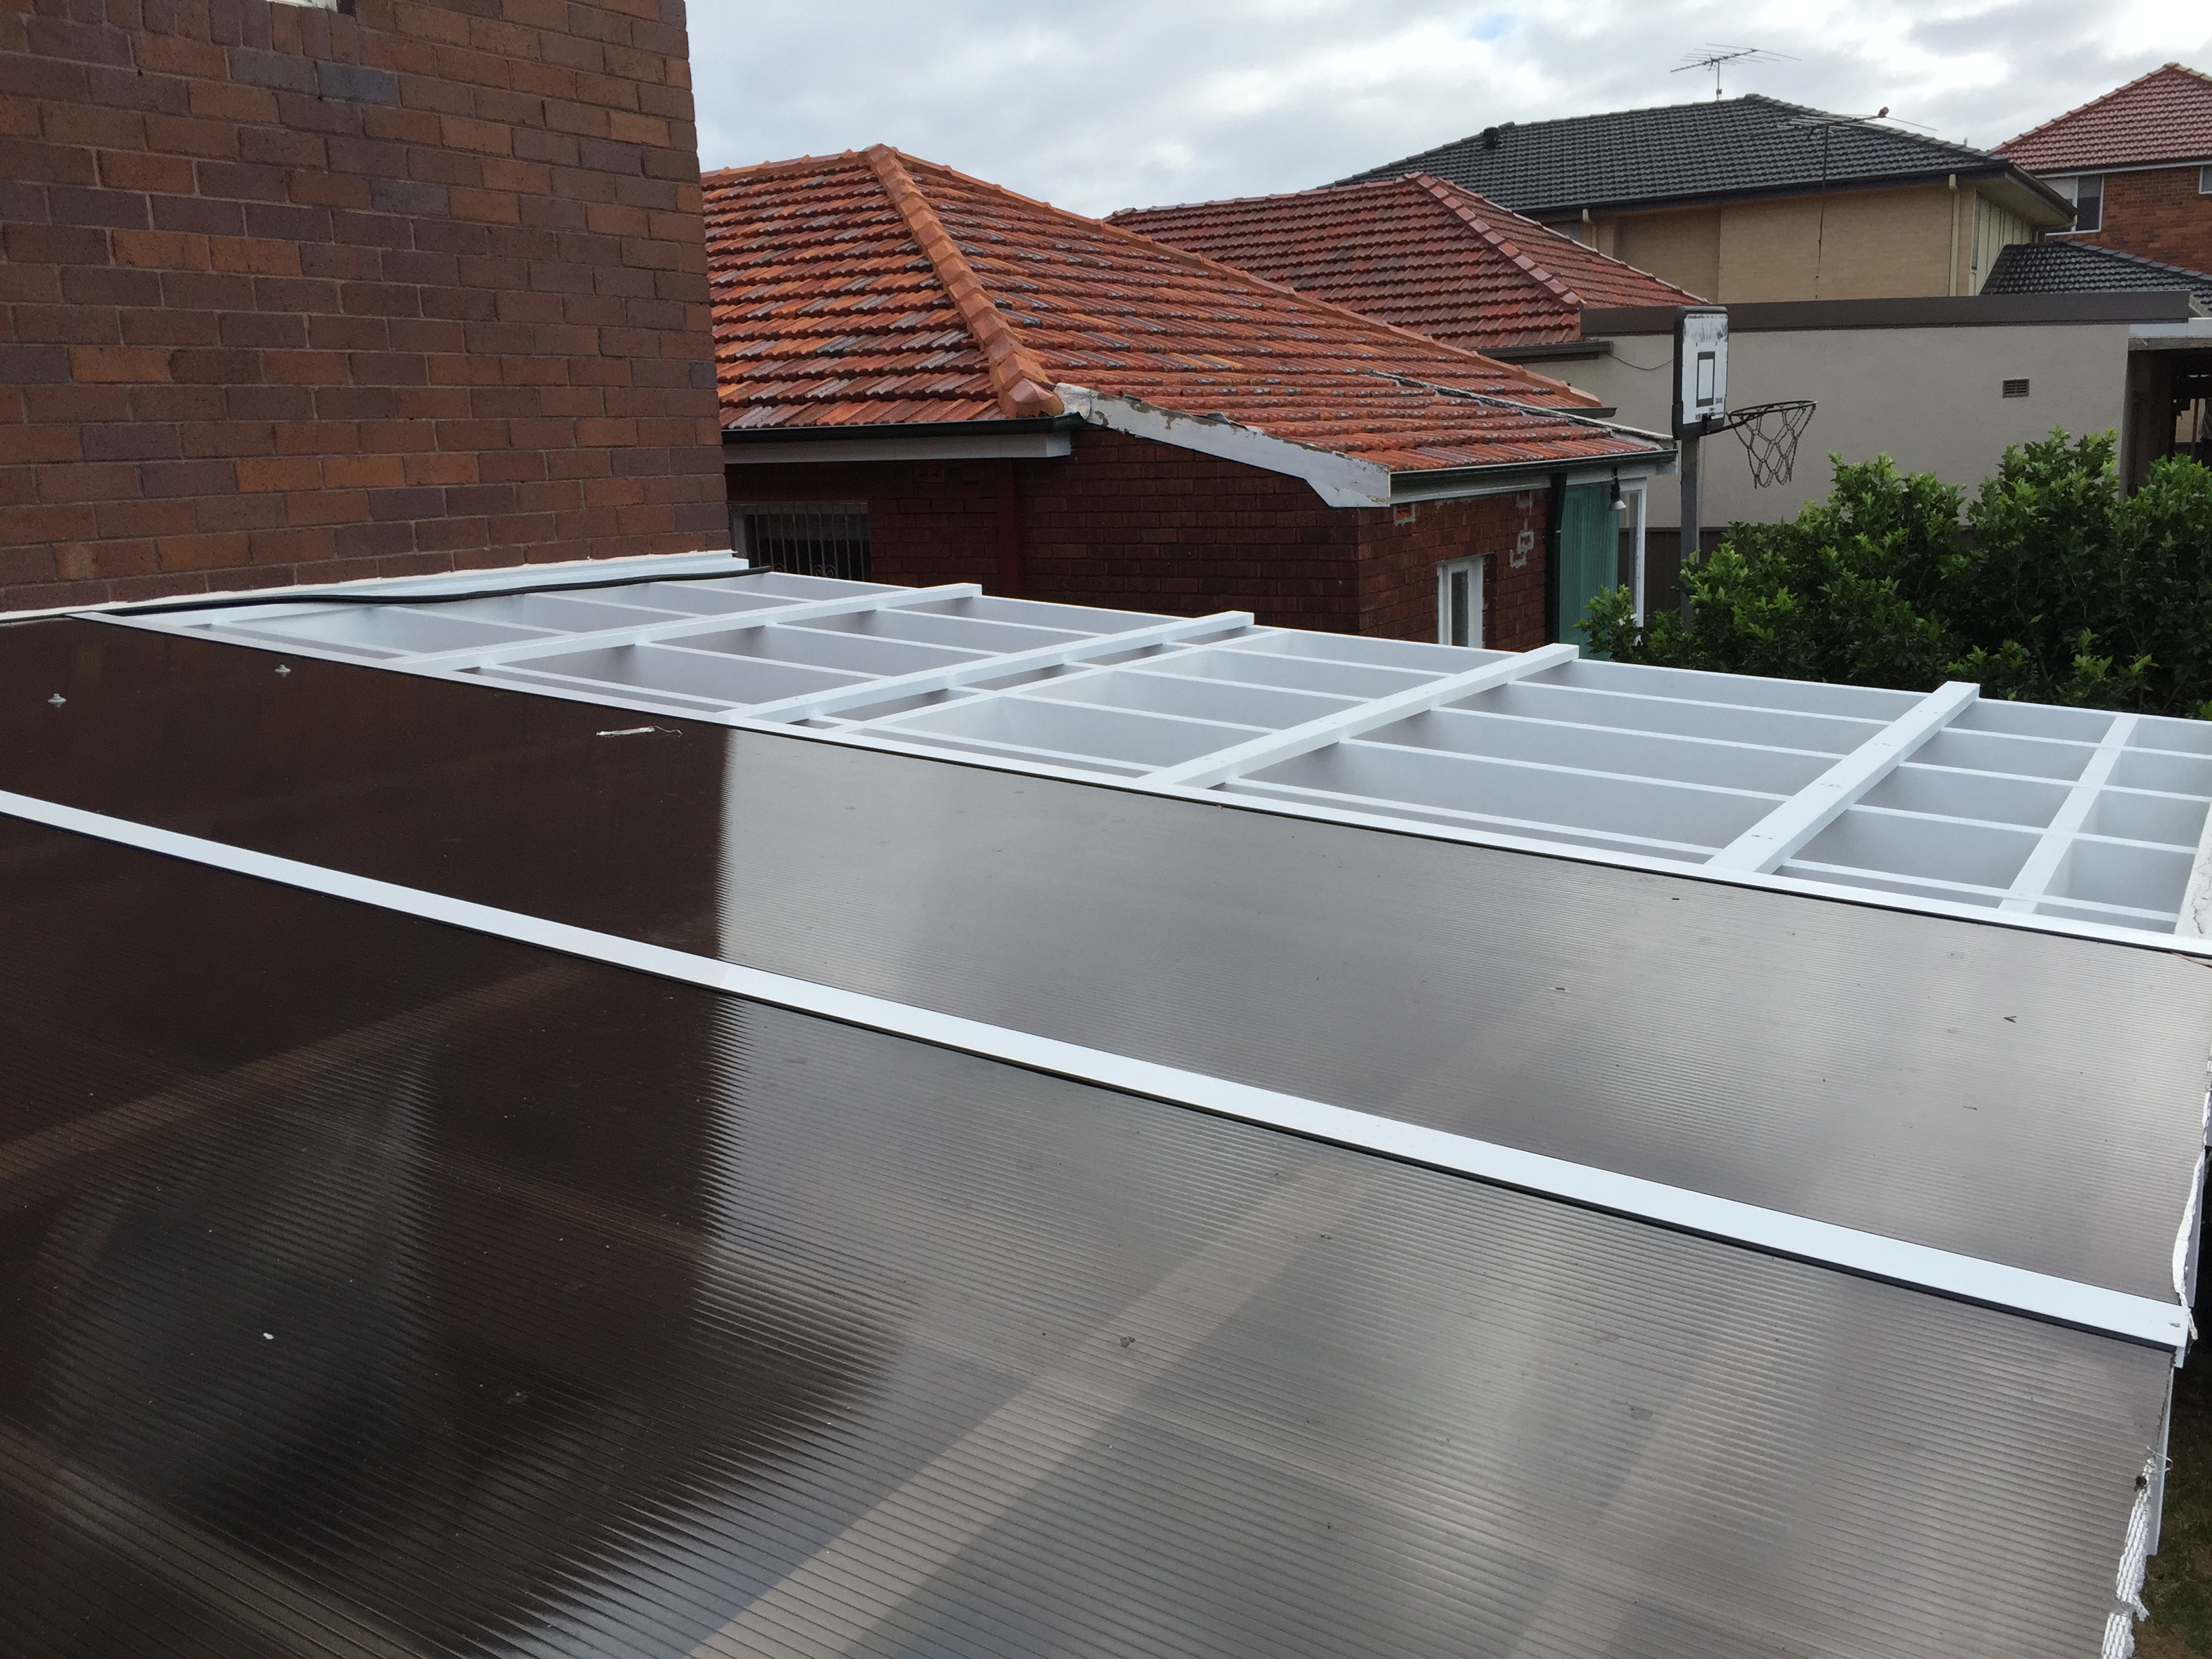
    It would be a fair estimate to say that at least 20% of all the roof repair calls we receive at Queensland Roofing are from people that are looking for solutions to repair leaking joins between their timber pergola, carport or veranda, and their house. This occurs because the roof construction was not fully considered prior to the build. Too often we see timber pergola, patio or carport structures that are not properly connected to the houses they are build next to. If you are building a structure that is designed to keep water out, it is absolutely essential that you design a roof that will join the new structure to the existing structure.

    In a nutshell: Think about the design of the roof first.

    It is absolutely essential that when you ad a new structure to your home that needs to be water proof you consider the application and design of the roof first.

    Things to think about when designing your timber pergola, carport or veranda.

            1. How will the roof be installed and will their be satisfactory water run off?
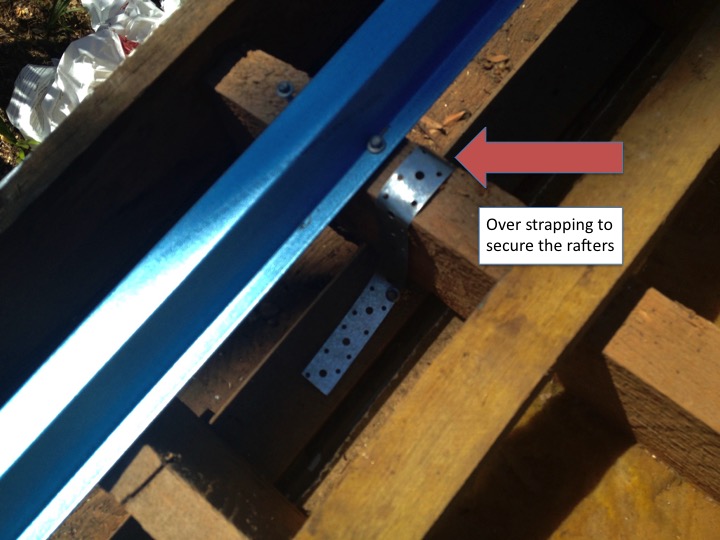
            1. How will the timber be fixed to the main house? (will I need hockey stick brackets to join the rafters)
            1. Will I loose height at the end of my timber pergola, carport or veranda if I have to have fall?
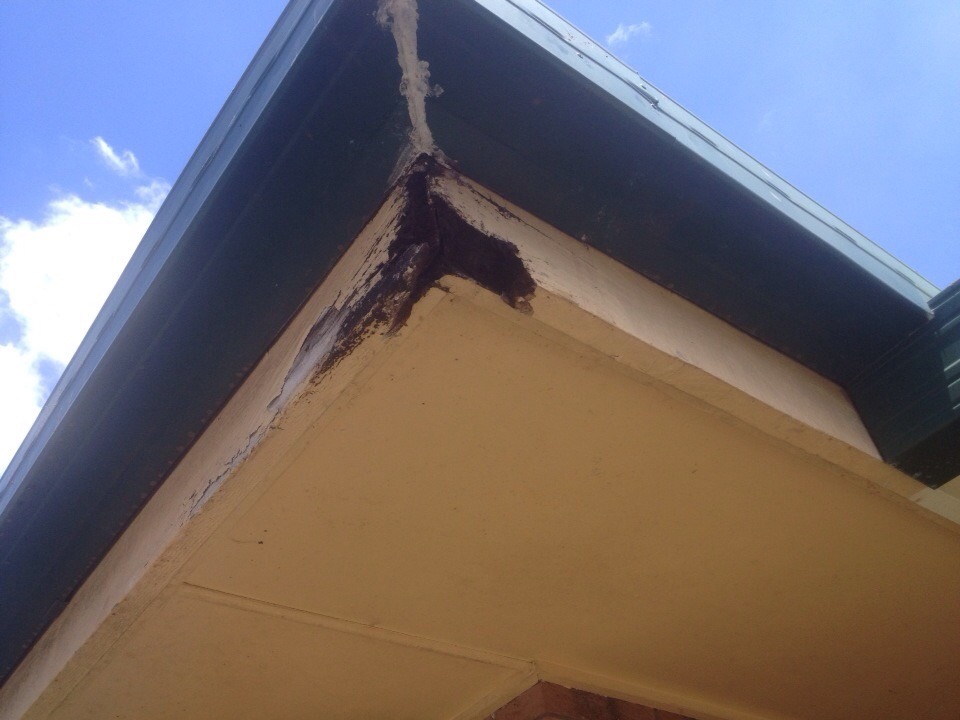
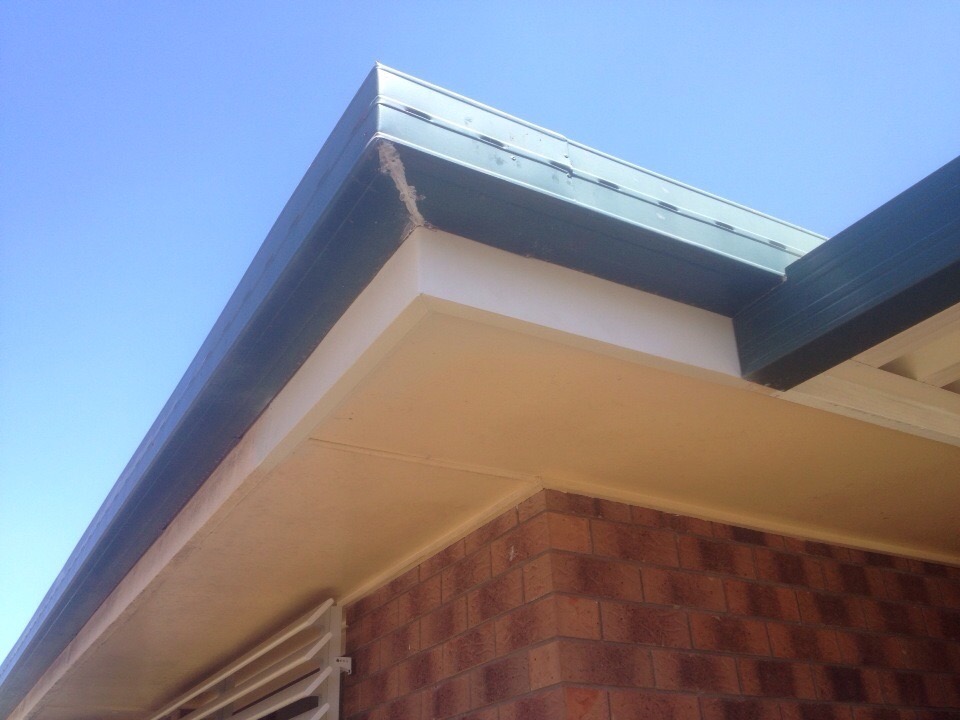
            1. What will happen with the existing gutter that is on the main house
            1. Will the roof have significant fall? Corrugated needing at least 5 degrees and Trimdeck needing 2 degrees
            1. Where will the water from the veranda go? Can I connect it to storm water or will I need to run the excess water into the garden?

    Why choose Queensland Roofing for your timber pergola, patio or carport
    The unfortunate truth about the majority of carpenters is that they are not trained in the ins and outs of metal roofing. Metal roofing is a skill set of it’s own, hence why it is a separate license category. This is why there are so many timber pergolas and home additions that leak.

    Patio Roofing Mistake
    This is a prime example of the roof of an addition that will need to be repaired. It has not been designed properly.

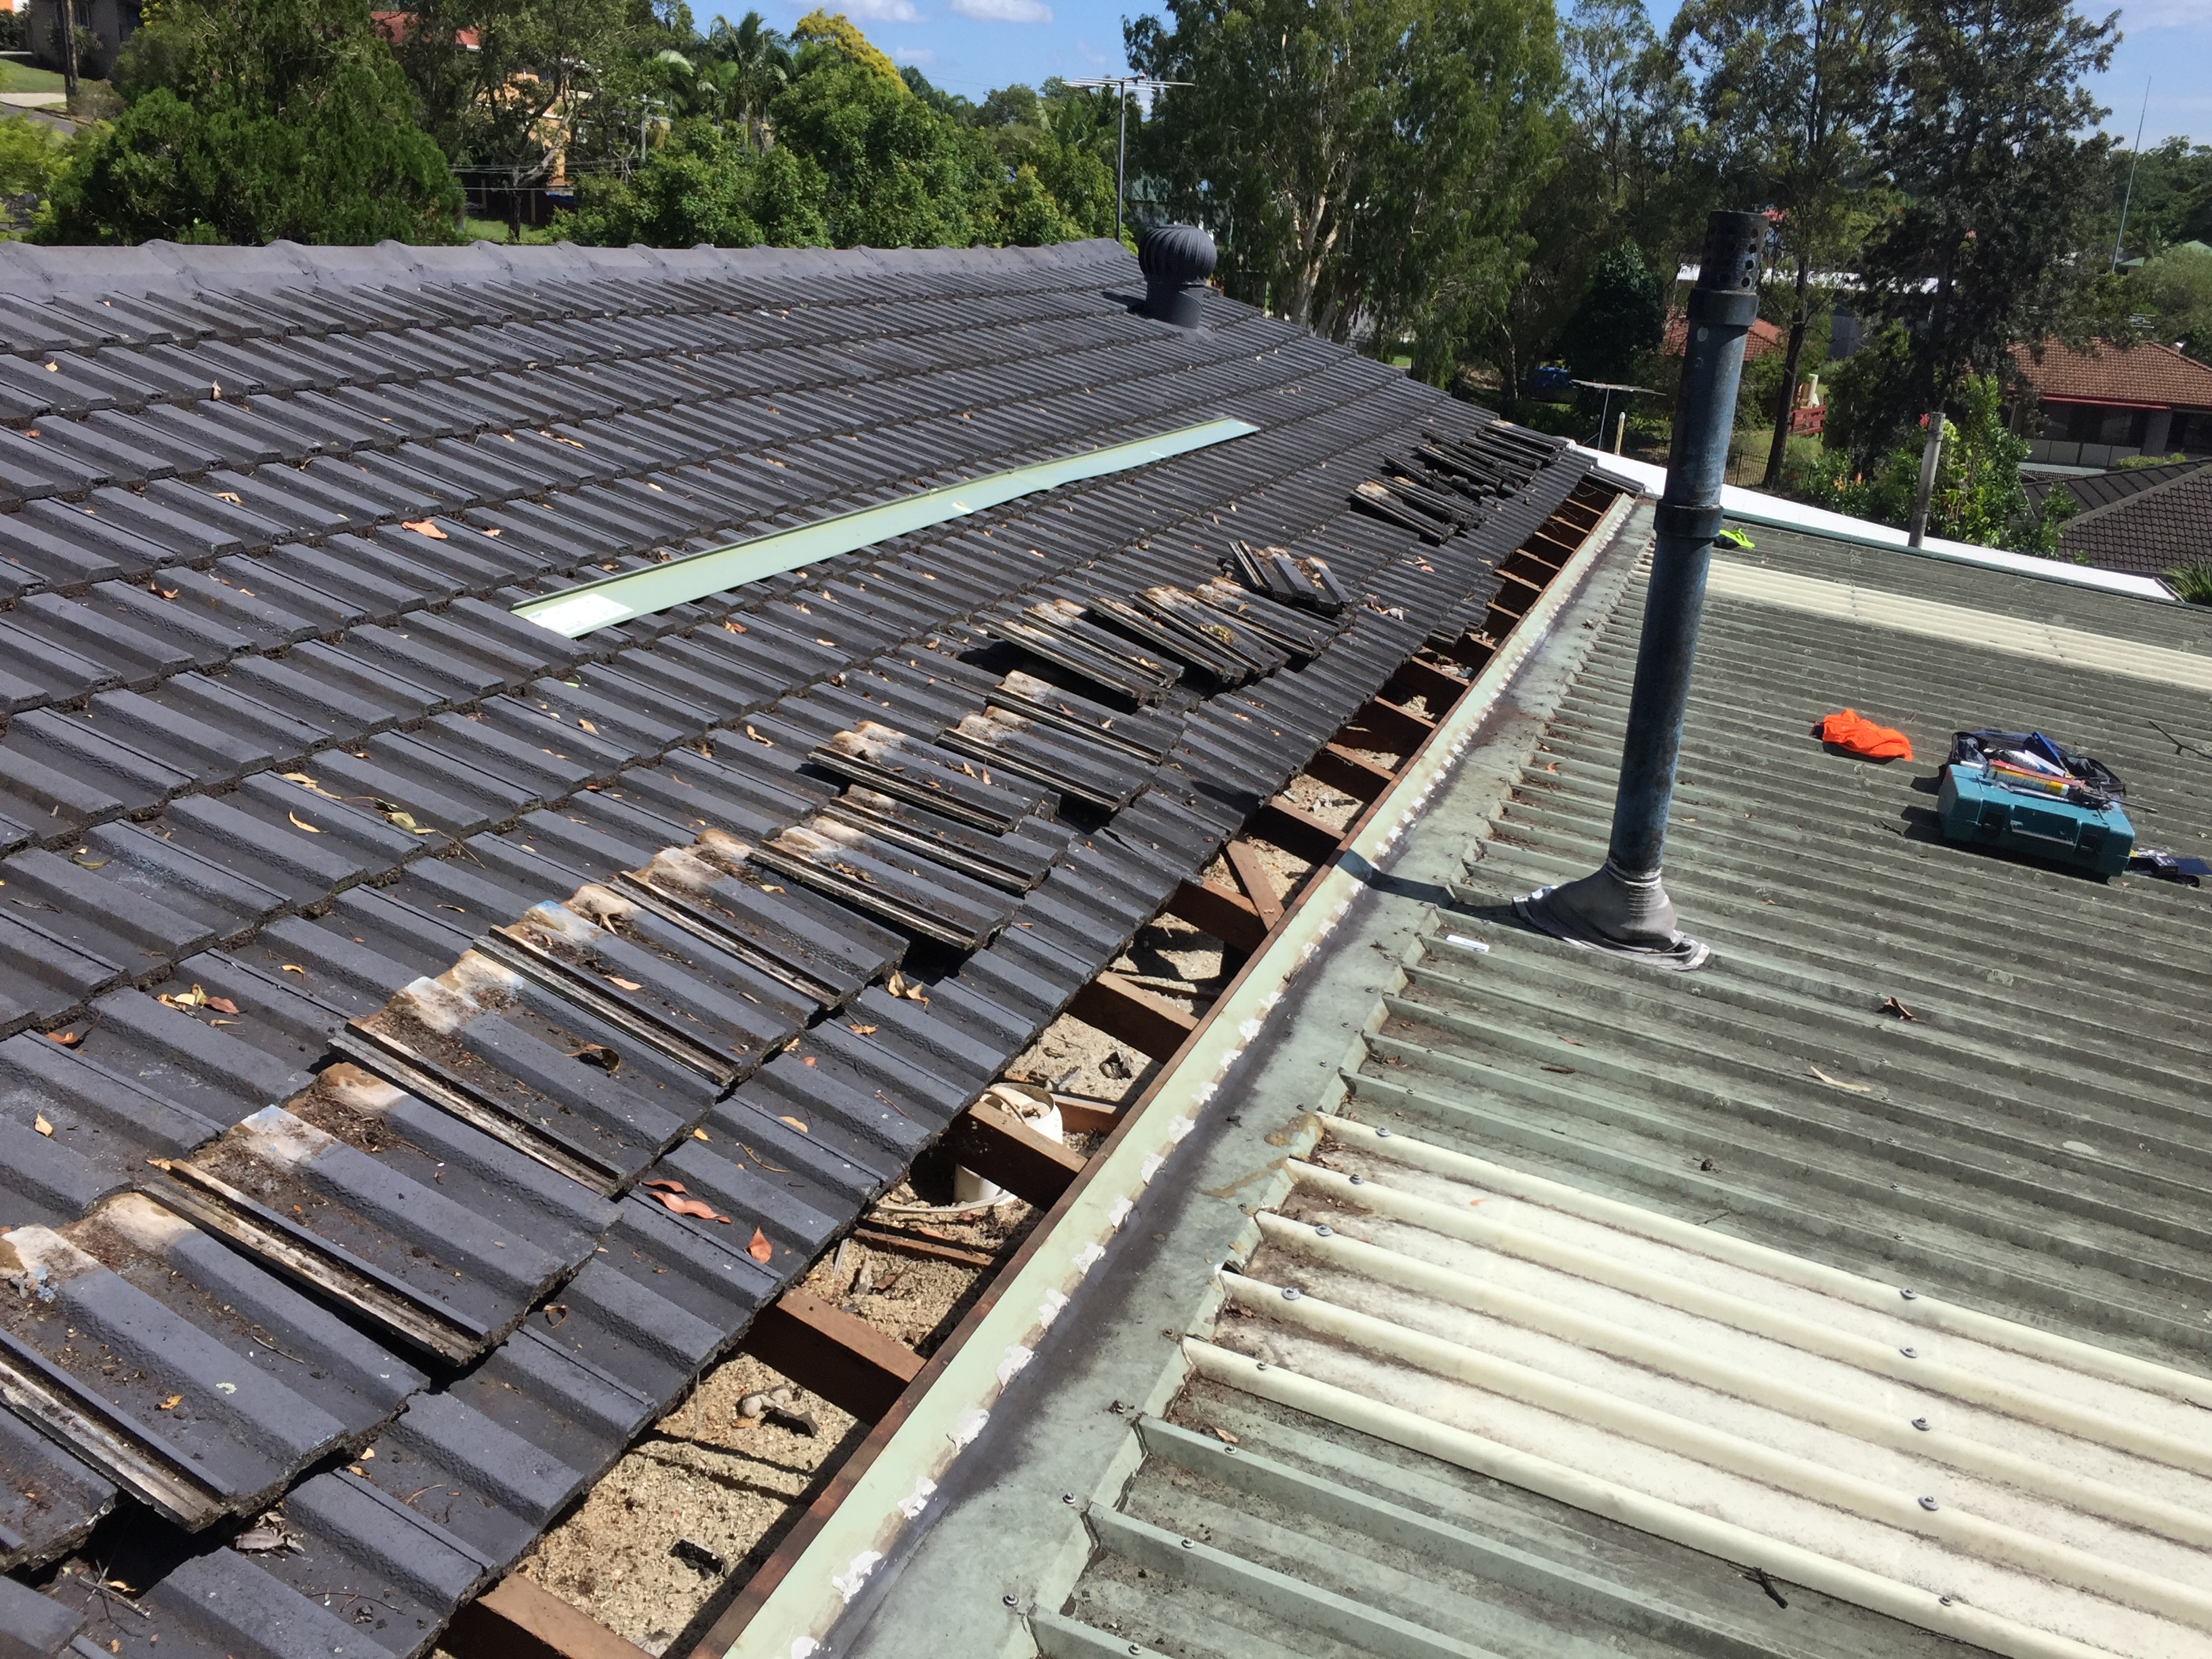
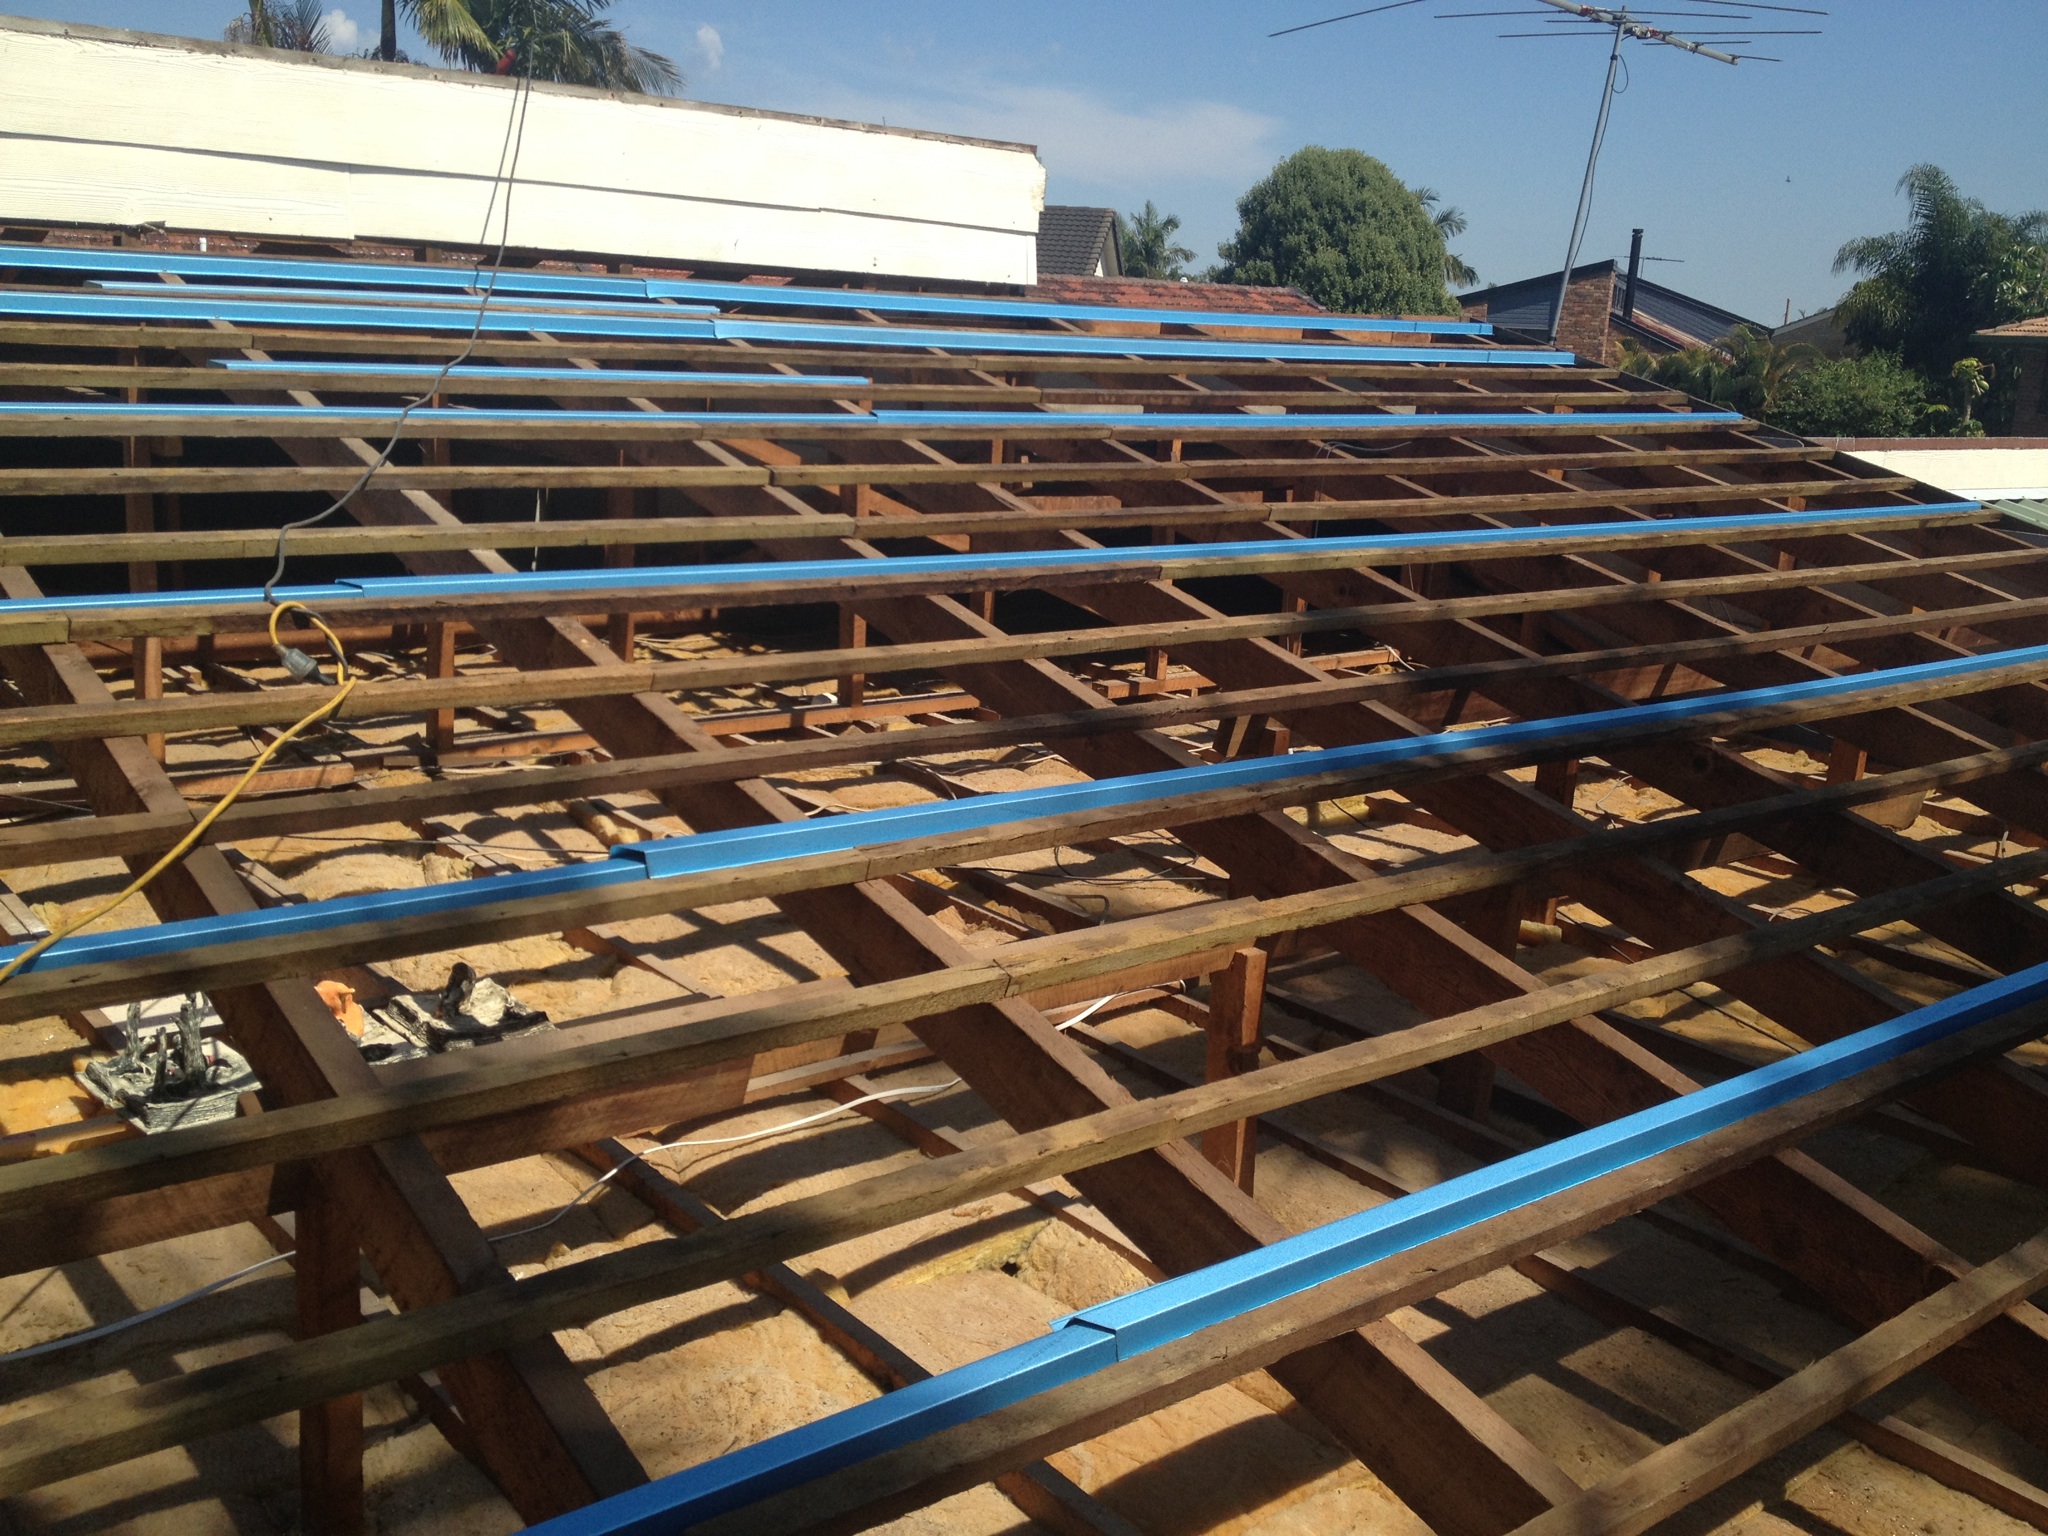
    Replacing old timber structures
    Much of the timber pergola work that we do is replacing old timber pergolas, patios and carports that are no longer structurally sound. With time the structures can become weak and the complications start to arise. Also as mentioned so many times on this page, one of the reasons is because of the existing timber pergolas, patio or carport having a leak. Some times it is impossible to fix the leak, and the only options is to rebuild the frame so that the roofing application can be re-designed.
    What type of roofing should I use for my timber pergola?

    Patio roofing materials
    There are a range of options that now allow light in while still have insulation properties.

    The roofing material that you should use for your timber pergola, carport or verandah comes down to what you would like to get out of your out door living area. This is something that we should discuss when onsite and looking at your particular application, as some roofing is much more practical that other in relation to longevity. Call for your appointment today on 0489 263 653
    [/av_textblock]

  • Roof Replacement Tile to Colorbond or Zincalume

    [av_textblock size=” font_color=” color=”]
    Roof Replacement Concrete tile to Colorbond or Zincalume

    Roof replacement from concrete tile to Colorbond or Zincalume Roofing is an extremely common process that is often undertaken by home owners that have concrete tile roof that has reached the end of its life.

    You can replace your tiled roof with a new Colorbond roof in one of the many Colorbond colours. Or you can opt for a straight metalic Zincalume finish. If you are unsure of which Colorbond colour to choose make sure you check out our video on choosing colours. Roof replacement from tiles to iron usually comes about after one of the the following issues has occurred with a tiled roof.

    1. Hail damage or storm damage to the roof rendering an opportunity for the owners to move to an iron roof.

    2. The age of the tiles and potential tile pitting. Please refer to our section on tile pitting

    3. The concrete tiled roof has been painted and restored multiple times and cannot successfully be restored again.

    4. The roof is in an extremely leafy area with the break down of tree matter causing leaks between the tiles.

    5. Insulation and issues with heat. Tiled roofs are much hotter that iron roofs that have anti-condensation insulation blanket

    Roof Repairs are being performed to the timbers and/or structure of the roof due to termite damage, please refer to our section on termite damage and read about the tile to iron re-roofing process when truss or rafters need to be replaced.

    When a concrete tile roof is replaced with Colorbond or Zincalume there are a few Australian Building Standards that need to be adhered to. This is due to the fact that the new Colorbond roof will be much lighter than the original concrete tile roof. A new Colorbond roof weighs a lot less than concrete tile so the roof timbers need to be tied down.

    The photo below shows the patterns that is used with the 40mm top hat metal battens that have been prepared for the the metal roof to be installed. Due to concrete tiles needing a shorter batten pattern and also a thinner batten, the timber battens will not suffice for a metal roof. All these battens are screwed down in preparation for a metal roof.

    Metal Battens in Roof Replacement
    Metal battens are used when the tile conversion takes place
    Batten Set out for tile to iron roofing conversion
    Moving from tile to iron when there are hips and valleys required more set out time.

    One of the other things that needs to occur when you are changing a concrete tiled roof to an iron roof is the ends of the rafters need to be strapped down. This over strapping is another essential part of preparing the new roof for the fact that because the metal roof will be much lighter that the tiles in needs to be braced to the house. There a have been situations when this step in the re roofing process has been missed and resulted in the roof literally lifting off.

    Over strapping tile to iron roof replacement
    Here is the over strapping that fixes the rafters down before the Colorbond roof gets put on.

    [/av_textblock]

  • Timber Fascia Replacement and Repairs

    Timber fascia replacements and repairs are often performed as part of a gutter replacement job. There are times though when timber fascias are in need of repairs even when the gutters are still in good condition. Often the best way to check fascias is through touching the timber and checking for softness. The reason you have to physically touch the timber is due to many occasions where the timber fascias will appear to be intact because the paint is making the appearance look ok. However upon closer inspection of your timber fascias you will find that the timbers have rotted and underneath the paint is quite soft. Timber fascia replacements are needed when the timber has reached a point that they are presenting a threat of falling down or when they are not doing a proper job of holding up your gutters. Timber fascia repairs can often be performed when the rot and deterioration on the timbers is more so at the ends of the fascia. Please see the photos below for examples.

    Timer fascia repairs Brisbane
    Often dry rot will occur at the end of the facias boards and work its way along the timber fascias
    Timber fascia repairs are most easily performed on the ends of the timber.
    Timber fascia repairs are most easily performed on the ends of the timber.


    Where timber fascias can not be repaired they will need replacement. Painting timber fascias before the are installed is an absolute must. Fascia boards usually come pre primed so painting facia boards is usually a relatively easy process. On many occasions we have delivered timber fascias to home owners houses and our customers have opted to paint the timber fascias themselves. We are more than happy to allow this, as long as the owner understands that the timber fascias will need two coats of paint with appropriate dying time between the paint applications. Also, you must ensure that you are using the correct external paint. The team at Queensland Roofing are more that happy to guide you through the process, or you can simply as us to do the painting for you.

    For more a full free no obligation quote on your timber fascias call Queensland Roofing today and we can give you are risk free assessment.

  • Leaking tile clips

    The topic of leaking tile clips or leaking hooks (whichever you wish to call them) deserves its own dedicated blog. Explaining to a home owner why the very design that is holding their tiles down is the same thing that is now causing their roof to leak is difficult to believe and rarely well received. Luckily it is simple to understand. The biggest thing we hear from homeowners when we tell them they have leaking clip syndrome is “I’ve been living here for a long time why would the tiles be leaking now? I’ve never had a problem before”. This is a great clue as to the problem often being something that forms over time. So that I can create a fast but detailed explanation, lets answer these 3 questions.

    1. What causes leaking tile clips?
    2. How do I fix leaking tile clips?
    3. Do I have options to fix leaking tile clips?

    Leaking tile clips occurs when the hook that goes over the edge of the tile can (often with the involvement of external factors) create a blockage in the water flow between tiles. If for many years there has been debris and dirt on the roof, the result is blockages in between the tiles. This occurs because, rather than the dirt and debris passing between your tiles and being flushed down into the gutter, the dirt and debris gets caught on the hooks and starts to build up like a dam in a river. The water then backflows over the edge of the tile and into the ceiling.

    Leaking tile clips Brisbane
    Notice the crack on the water channel. This can occur and be mistaken for leaking clips.
    Leaking tile clips Brisbane
    This photo perfectly show the hook over the edge of the tile and how the nail at the bottom holds to the timber.


    How do I fix leaking tile clips?
    Remove the clip by unhooking it, brush out the dirt and debris from the watercourse, and then use a differently designed spring clip different clip, (refer to the picture below). The ‘spring clip’ does not use a flat strap and allows the water to pass around both sides of the clips. Due to Australian building standards you cannot simply leave the hook off, as tiles still need to be held down to the timber structure.

    Do I have options to fix leaking tile clips?
    The options for fixing leaking clips on a tiled roof depend on the severity and the extent in which the clips are leaking. In some situations only a few clips will be leaking, however, there have been many instances when we have started pulling up tiles and have found that the vast majority of clips are leaking. The reason that the homeowner may not know this is because a clip can cause a leak into the ceiling but it may be a very slow leak. Therefore, when the rain stops, the ceiling dries and the mark/stain does not show up visually on the homeowners ceiling inside the home. It can take years for a leaking hook to actually appear as visible damage on the underside of the ceiling. While it may not appear on the ceiling inside the home, from the other side (inside the roof space), you may find that a very different story is told. Sometimes drip marks are seen throughout the entire ceiling.

    Spots on the ceiling leaking roof
    Spots on the ceiling showing perfect proof of leaking clips on a roof Brisbane
    Leaking roof Brisbane
    Leaking clips leave really evident marks.


    Nail clips are designed to hold the tiles down to the timber structure of the roof. There are other methods to hold the tiles down including wire and nails, but unfortunately maintenance on these tiles can prove more difficult. Lifting tiles that have been nailed down to timber can often result in damage to the tile. Removing tiles with wire is extra work as it means cutting the wire or untwisting the wire, which has to be done from underneath. While a lot of leaking nail clips fail due to maintenance of dirt and debris, there are also situations where we have seen the nail clips leak without any debris in the watercourse. Put simply, there are a few different factors that can cause nail clips to leak. While I have kept specific with dirt and debris in the article, be sure to call us for further information.